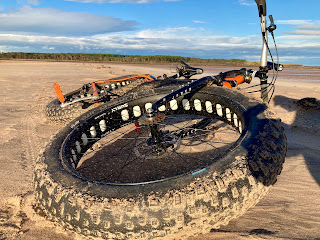
Can A Fatbike really be made rust and corrosion proof?
This is something I have written about over the 12/13 years of owning and riding Fatbikes here on the Scottish east coast and the exposure of salt water and wet sand and what it can do to a bike if the bike is not prepped well first. I have experimented with various products from Linseed oil then special frame saver and products like ACF 30 for inside frames - none of which actually properly work and all wash out and eventually attract surface rust, and until recently after trial and error i eventually settled on the same preparation on new builds for the last few Fatbikes I have built which you can read the last update of Here...
Some folk are instantly going to say just buy a Titanium bike as it will not rust, well a titanium frame set would indeed not rust... but it will cost you thousands of pounds esp a custom fatbike build... and the thing is the frame is not really the problem it's all the small parts that corrode and seize... 4130 Cro Moly Steel - which I usually refer to as BMX steel is as good as it gets for steel Fatbikes as its quite light for what costs and it's strong, and lasts... my 10+ year old original Surly Fatbikes are proof of that... and it can take knocks when you fall off it and eventually you will take a tumble or two cycling on wet greasy rocks exposed at low tide - so of course that for me rules out using a Carbon frame, with the costly repairs if damage is involved...
Next folk will say to use an alloy Fatbike frame, well I could, except while folk think it does not rust it does not, but what it does do is corrode and fatigue with age and if you disagree then just look at anything made of aluminium left on the coast, you won`t see many things made of aluminium around a Scottish east coast harbour i can guarantee as it will disappear to powder in a few years... A small dent on a steel frame is hardly noticeable but can also be quite unsightly on an alloy frame...
so I started with and will continue to ride steel Fatbike frames for coastal cycling here on the east coast, but wanted to find an ideal treatment for a whole bikes components along with a frame treatment to protect it which also includes a chain coating - which needs to not attract sand, and different materials of components...
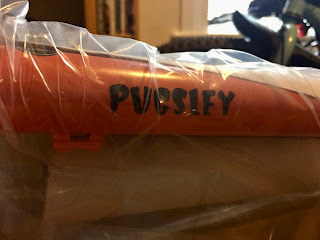
When I decided to paint this Pugsley completely covering as many surfaces as possible it was to try stop rust and corrosion on the usual suspect areas, one of the worst is the wheels esp the spoke nipples where stainless steel spokes meet brass spoke nipples which meet alloy rims which seems to create some sort of chemical reaction when exposed to salt water. I`m not a chemist so cannot really explain what happens... coating the complete bike in several coats of red oxide primer and then Army green paint was a start, but paint will get worn through and chip so a further treatment would be ideal..
Until recently I thought doing the paint thick on everything was probably as good a set up as i could do, until having read and watched loads of online reviews of Lanoguard which is derived from the Marine Industry i thought this is worth looking into, and having prepped the underside of my Willys Jeep - you can read that Here...
Following on from posting up on the Orange Pugsley 2.0 beach bike getting a spruce up and treating the usual surface areas that always get a corroded finish due to salt water exposure cycling on the coast...
I had posted about doing this online on the Facebook Lanoguard users group page and Lanoguard suggested I heat the Moto grease and apply a thin coat to the chain and it will provide a rust proofed non fling waterproof covering - after all their grease is used on crane wire cables in Ports and other industry and while I was sceptical about it attracting sand and just becoming a magnet for a big mess of grinding paste I thought what the hell as KMC X8 chains are usually only £10-£15, so if it does not work I will just replace it...
The grease was going to take all day to melt on a small heater so I took it inside and sat it in a pan in the sink and filled it with roasting hot water, by the time I made and drunk a coffee it was melted...
Using a small brush I paint the liquid coating the whole chain, then wiped it down after to remove excess...
The bike would not be out for a few days to see how it will turn out, then I thought about what I was going to try next and thought why wait?, and that was treat the frame around the usual rust spot areas and the whole wheels - minus the brake discs of course!, when I painted the whole bike with oxide red primer before Olive drab green I had wondered if I could make this bike rust and corrosion free?, it was already a test platform to try out the Microshift Acolyte 1 x 8 wide ration group set on (more on that soon once they have done a few more miles) and I`m also thinking using Lanoguard grease on all bearings needing repacked and anywhere threaded needing grease to prevent seizing may if it all works could make this UK product the go to product for saltwater preparation...
So with the bike upside down I rolled up and then wrapped rags around the disc rotors to cover them, then shaking up the Lanoguard I poured a little into an empty bike cleaner spray applicator - now you may think any sprayer would do and it will, but using a regular sprayer like this one for bike cleaner or say a DIY Center sprayer etc will work but Lanoguards own hand sprayer which I do not have but now purchased having since read up on as it is better as it produces a finer spray so you don't waste as much of the Lanoguard liquid and so saves you money as it goes further...
It took just a few pumps to cover the bike which was then saturated, I then gave it all a wipe down to remove access where it is not needed as much, then left it to soak in overnight before removing the disc covers, I would then leave the bike a week before using to allow the Lanoguard to set to a wax like finish...
A Week later...
The bikes surface was now near dry to touch and not greasy or sticky as expected, so moment of truth... and I went for a cycle with G and we headed out around the point at JMCP...
Wee film, Song is `Yesterday` by Latch Key Kid,
Results...
Back home and i thought the drive chain would have become a grinding paste disaster with greasing it but no it was actually ok!, not any more sand attached than using my usual preferred Squirt Dry lube....
I washed the bike down and the sand was easily hosed off and Lanoguard grease coating has remained...
And after drying it with an old towel the next evening there was no new surface rust to be seen on the chain which usually happens when putting away a wet bike...
Intrigued I sprayed the chain direct once fully dried a few days later with Lanoguard liquid to see how that works on the chain, which i will report on how that goes next once it's sat another week to allow the Lanoguard to firm to a wax like finish...
Going by the results so far I think I will definitely use Lanoguard inside frames in the future and have ordered their own hand sprayer bottle with their wand - a long pipe with 360 spray end for spraying inside chassis box sections and should work inside bike frames aswell as outside on the underneath and chain stay and seat stay areas of frames in the future - though I only have one other fatbike to build... but if all goes well I will fully build that bike up preparing it with Lanoguard Moto Spray and Moto grease...
Update; Proofing inside a Steel frame with Lanoguard....
And last week the Lanoguard new hand sprayer and wand turned up...
The sprayer nozzle unscrews then you just add the wand...
The reason I bought their own hand sprayer was i myself discovered the bike cleaner hand sprayer I used to spray the green bike saturated the bike by having too big a spray nozzle aperture and basically it wasted some of the Lanoguard liquid by applying too much. I then watched a Lanoguard film explaining how they have experimented with spray nozzles and flow rates to find the optimum flow rate .4mm aperture nozzle to best apply a thin sufficient coat...
So time to try out the wand and I unpacked a brand new Surly Pugsley 2.0 frame set I bought and stashed in the loft after I found out these frames were not getting made again (hopefully Surly Bikes see the light and change their minds)...
Before I brought it in to unpack I did something I do to all Fatbike frames that are not already done and I drilled a 6mm hole under the bottom bracket, this supposedly voids the warranty but I cannot see anything going wrong with this frame to need bother about that, and it saves water collecting and trashing bottom brackets...
The newer Surly Frame sets are ED coated to help prevent internal rusting but Surly still recommend a frame saver product so I am going to use Lanoguard.
Before treating the frame i added white graphics as I think they look so much better,
The build of this bike will be in another blog post of it's own so on with using the Lanoguard Wand and hand sprayer to treat inside this frame...
Here is Pt 2 film prepping the frame with the wand and hand sprayer, the Lanoguard hand sprayer is superb and gives a nice fine spray with it's fine nozzle...
In a few weeks I will get this frame set built up and do a full film on the prep with the build of components
It`s not quite 2 years since I got this size Large Surly Pugsley frame set 2.0 from Surly to build as a project from Surly HQ when I was recovering from Cancer...
The Orange frame sets were the last Surly Pugsley version and were only available in one production run sadly , as they are definitely the best Surly Pugsley made yet - more why I think so in a bit, but it has been my go to beach bike the last 12 months after the first 6 months it having been built as a 29+ build for bike packing, in this guise the older Pugsley models had their bottom bracket raised a full 25mm fitting 29+ wheels (3" tyres), however the new Pugsley 2.0 has a lower BB for centre of gravity when heavily loaded for off road touring and it is also designed for 4.4" tyres that have a taller side wall than 3.8" referred to as 4" tyres) so it rides a treat 29+, I planned a lot of riding and camping with this bike set up but it never happened... as it would end up hanging in the garage not in use as the Covid Pandemic and lockdown hit the UK in 2019...
Surly designed the production complete bike to run 26 x 4.4" tyres both ends on 80mm rims with reversible wheels for bail out emergency's if a freehub or rear mech fails, or to offer different single speed gear options, a feature of the original Pugsley concept...
The new 4.4" tyre size that was introduced and filled the gap between the original 4" tyres (usually stamped 3.8") and newer 5" tyres (usually stamped 4.8"). The original 5' tyre that came on the Surly Moonlander was the Surly `Big Fat Larry`(BFL`s) and was stamped 4.7", but it is actually the same size as these newer 4.4" tyres. You still with me?, right then, the bike as all Pugsley`s do takes 29+ tyres but Surly said it will also take full 5" tyres front and back, though they said you will need to use a Moonlander fork on the front and you may have to pull the rear wheel back a bit AND it is still able all gears to be allowed to clear the chain...
This is by the way with a Pugsley 100mm wide bottom bracket (BB) - not the 120mm wide BB that the Moonlander used to get this to work, and later the Ice Cream truck despite being symmetrical used....
Here it is with a pair of stock Moonlander wheels and BFL`s on it as a trial...
With loads of tyre and chain clearance i splashed out on a Moonlander fork and pair of 4.8" Schwalbe Jumbo Jims...
Buying the ugly but quirky offset Moonlander fork a year ago allowed for full 5" tyres to fit front and rear as well as reversible (swappable) wheels...
The bike has proved in a year of coastal cycling to be my favourite Fatbike yet and the big Moonlander wheels eat up rocks and soft sand with ease...
Back to back riding the Pugsley 2.0 alongside my Moonlander that G used most of the Lockdown summer showed just how good the new Pug 2.0 design is, with a higher headtube increasing handlebar height and less pressure on your wrists, and increased standover, perfect chain alinement (great thing also with the Moonie) while on a regular 10mm BB so no `John Wayne` bowed legs rubbing ankles on the cranks riding out the saddle like happens on the Moonie (noticed how polished the crank arms are on a well used Moonlander....). The 142mm rear hub frame drop outs ( frames comes with spacers for 135mm hubs) also allows any type hub to be used from 135mm x 9mm qr, to 142 through axle, or the Shimano Alfine Internal Gear Hub (IGH), or more expensive Rolhoff IGH, making it truly versatile in Pugsley tradition...
Here is a film I made soon after the bigger tyre swap, see it eating up rocks of all sizes with ease...
After being real impressed with the ride of the new Pugsley 2.0 i was now searching for a Medium Orange Pug 2.0 frame for G and one eventually turned up (now here Pink Pugsley), and we had matching bikes with same parts which keeps spares stocks simple...
I also managed to buy another size Large new Pug 2.0 frame set via Italy, which is squirrelled away as once these are gone there gone, this one will get built up as 29+ in the new year as I have the wheels sitting along with 10 speed drive chain and cranks etc......
After a good years beach use I decided to sort a few things on my bike. First was the wheel set I bought used via eBay, the rear wheel was laced wrong and with cheap spokes that are now rusting...
See the gap between the spokes at the valve?, they should be parallel to allow your pump to fit in easy...
The front wheel spoke line is correct leaving a parallel gap...
Rusted cheap spoke kit with steel some nipples and steel spokes...
With a spare Surly Clownshoe 100mm rim and another Hope Pro 2 EVO hub I laced up a replacement wheel with white Halo spokes same as G`s bike...
Steel freehub is a better idea for saltwater exposure and easier to remove old worn cassettes which will dig into alloy free hubs...
Here is the only negative thing about the newer Pugsley 2.0 - the internal mounted rear brake calliper needs removed to allow the 5" tyre/100mm rim combo to be removed, also it is track to access the bolts you loosen/tighten to aline the calliper...
With the rear tyre off the older wheel I soon had it mounted up on the new built wheel using the tried and tested `Ghetto Tubeless` Split tube method, using a wrap of camp mat foam, then a 19 x 2.75 motorcycle inner tube which works perfect...
160mm of Stans Sealant added after tyre seated ok then re inflated and give it the `Stars Shake` , and done...
Trim off excess inner tube carefully using a new Stanley knife blade with a round magnet under neath to keep the blade away from the rim and tyre to leave a good finish...
Rear wheel done, removed and stripped the front wheel and replaced with new white spokes...
One side...
Then the other...
Trued and centered in the fork using a cable tie...
Wheels ready, I removed, sanded, primed, then painted the fork...
Next day a second coat of orange then clear lacquer...
Fork fitted I ran a tap through the bottle cage mounting threads to clear the threads of paint...
Some fresh cables always freshen up a bike and some white Jagwire cables soon arrived via eBay and were fitted...
I also decided to try applying some Lanoguard Moto Spray on surface areas which usually get corroded in time...
And I coated the control cables in it as well as oiled the cable outers with 3in 1 spray using a Motorcycle control cable lubricator...
With the cables on I used a small paint brush and dabbled Lanoguard on the usual suspect areas I find Fatbikes suffer from externally...
Disc rotor bolts...
Steel inner chain ring and bolts...
Exposed cable and alinement spacers and mounting bolts on BB7 brakes...
Spoke nipples and valve, including the threads of the dust caps...
I put on a new set of Nukeproof riser handlebars while at it as at £24 from Chain Reaction Cycles (CRC) are good value, G has these same bars on her Pink Pugsley and I like the bend. I also fitted a new Madison Flux saddle and all done...
Out for a spin with G on her Pink Pugsley 2.0
Wee film of our cycle... song is `#3` by Aphex Twin,
Back home and there was not much sand stuck to the Lanoguard I had applied to stop corrosion on exposed surfaces, and it washed off easy enough with the garden hose...
Some thoughts on prepping...
If starting a Fatbike build again - and I still have another Orange Pug 2.0 frame set I can build - I think I would prob spray inside the frame tubes with Lanoguard as they sell what is called a Wand - a 360 degree spray nozzle for chassis box sections etc, and externally spray around the bottom bracket and seat stays behind the seat post tube as this is where surface rust always starts. I am going to do this first on the Army Green Pugsley as it is a kind of test bed to see how clean it stays and if sand and dirt wash off ok...
What I am trying to build is a completely rust free low maintenance coastal cycling bike... I have worked out the parts that work well and last, and how to stop things siezing with salt water exposure using Marine Grease and Coppergrease over the years...
The Lanoguard treatment liquid and grease could be the ideal Beachriding preparation solution for here on the East coast...
Ideal for riding in these corrosive conditions...
Wee film from yesterday, song is `Grey Horizon` by Jaytech Feat. Melody Gough
I live in East Lothian, S.E. Scotland.
I fill my time with my hobbies, interests and passions. Often cycling along the coast here. I ride steel bikes with big wheels, I like to enjoy all interests of the coast, Its scenery, wildlife, local history, with my other interests in art and music when out and about...
I was diagnosed with Relapsing remitting Multiple Sclerosis in August 2018, it`s early days but i plan to continue to live my life as i have and show that having a medical condition like MS does not mean you need to stop enjoying your life,
Please excuse the bad grammar, i am working on it!